If your Windows 11 WiFi is not working, showing limited access data or Windows WiFi is Not Connecting to the internet than, you can try the following methods to fix the Wi-Fi network issues on your Windows Computer. If you are facing issues with ethernet connection then you can follow this guide to Fix Ethernet Not Working on PC.
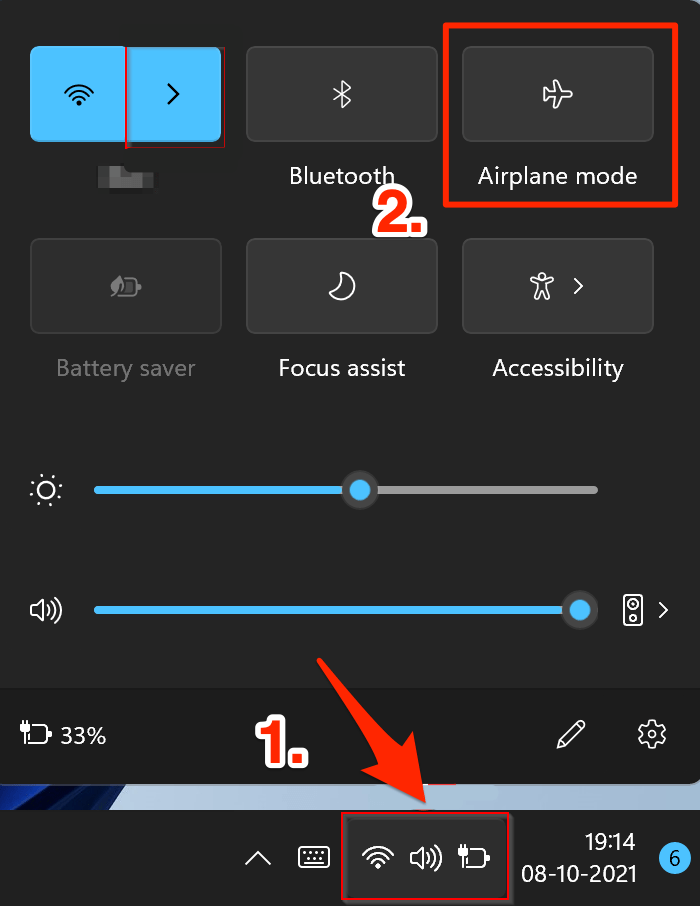
Fix 1. Use Flight Mode
Flight Mode is like a Mini Switch Off; it completely turns OFF the network radio on your Windows PC; this will give you a fresh instance on the radio. You can perform this operation by clicking on the action center and then turning Off and On the flight mode.
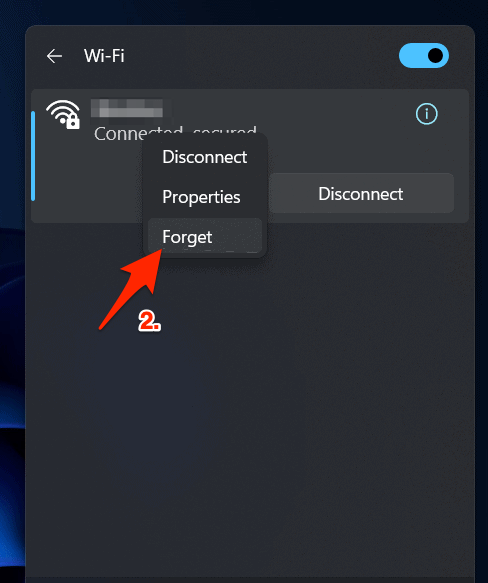
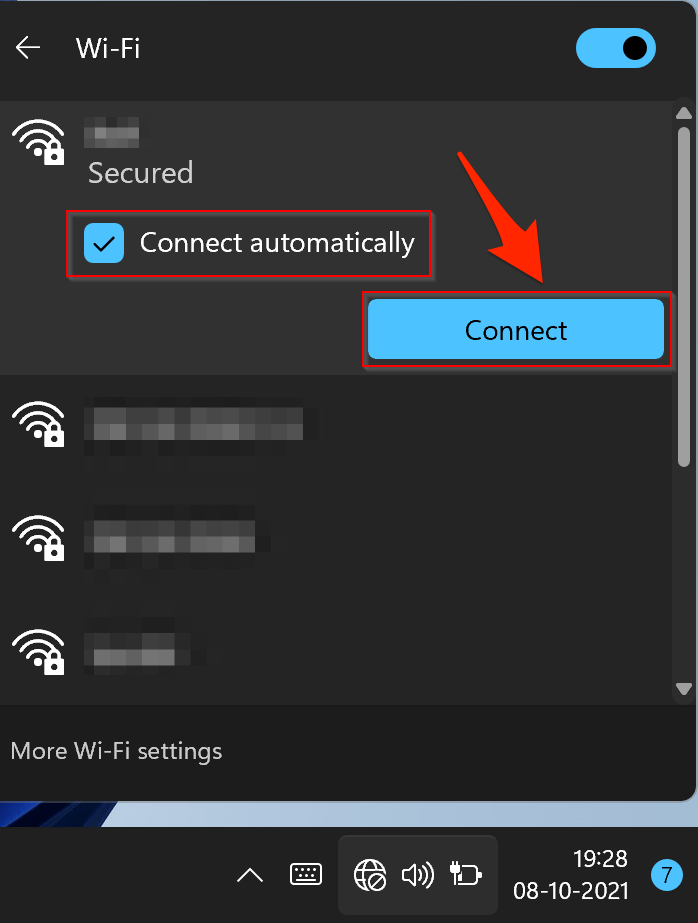
Fix 2. Forget and Reconnect to the Wi-Fi Network
A miscommunication is happening between the Wi-Fi router or Hotspot and the wireless module in the machine. If this is the issue, just erase the Windows configuration by forgetting the network and re-connect to the same network again. You have to enter the wireless network password, so make sure to note it down beforehand.
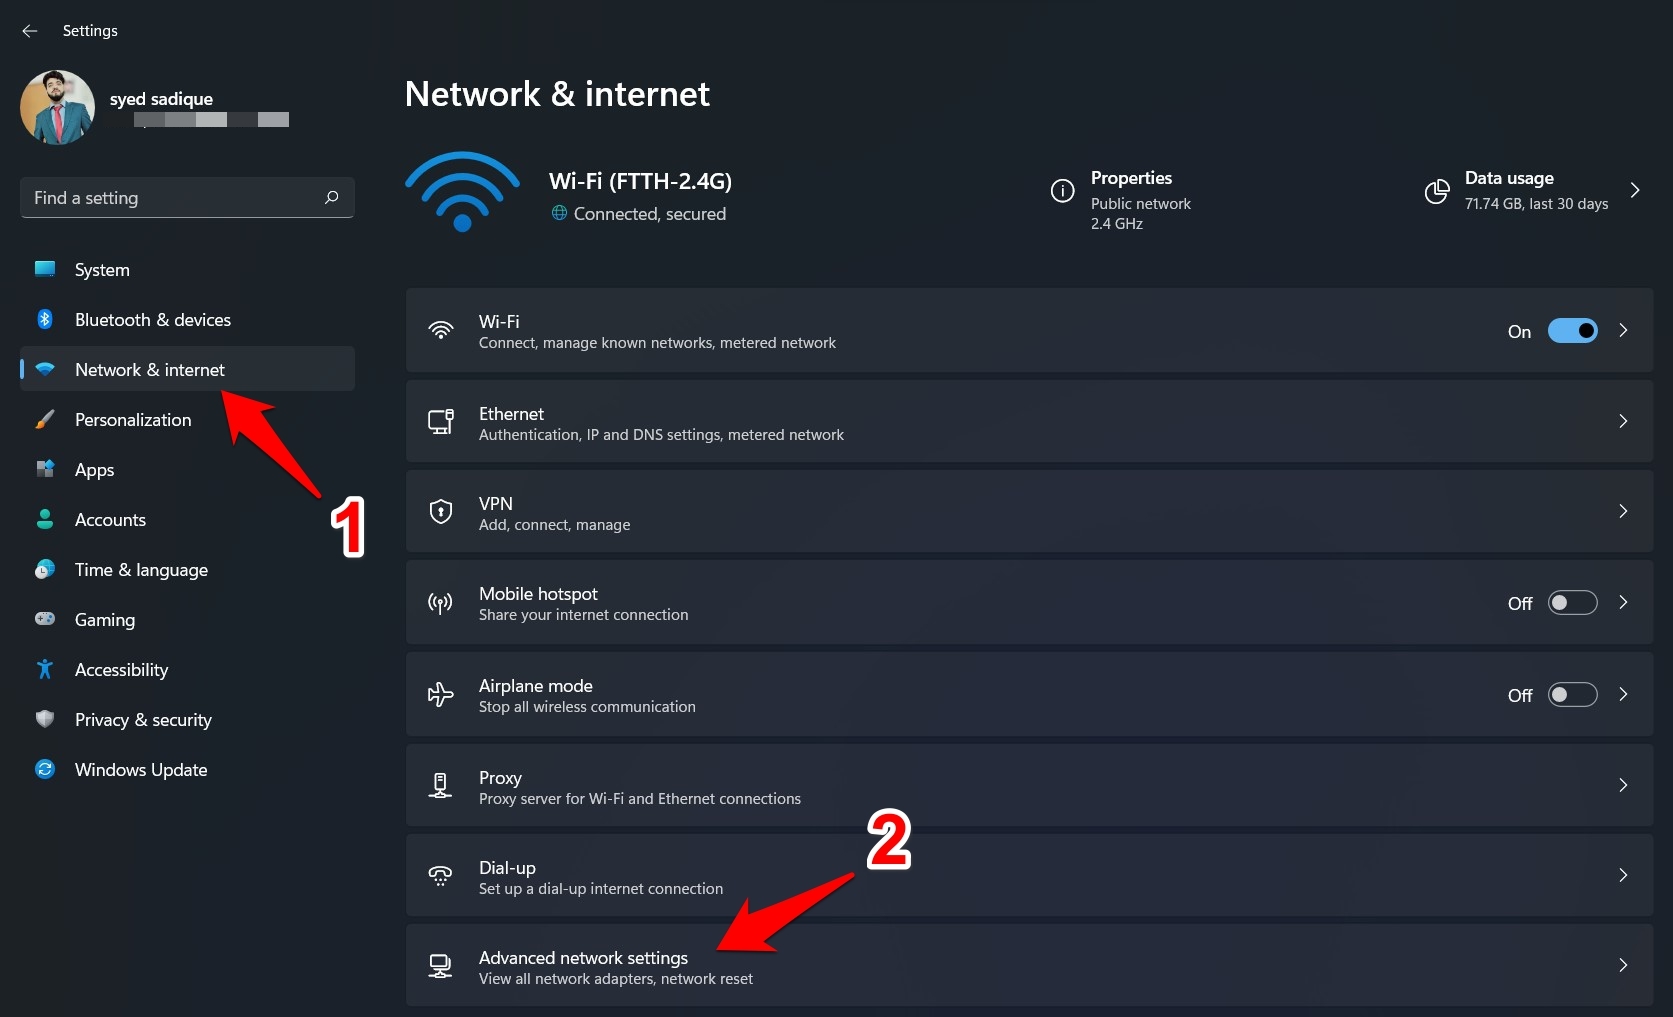
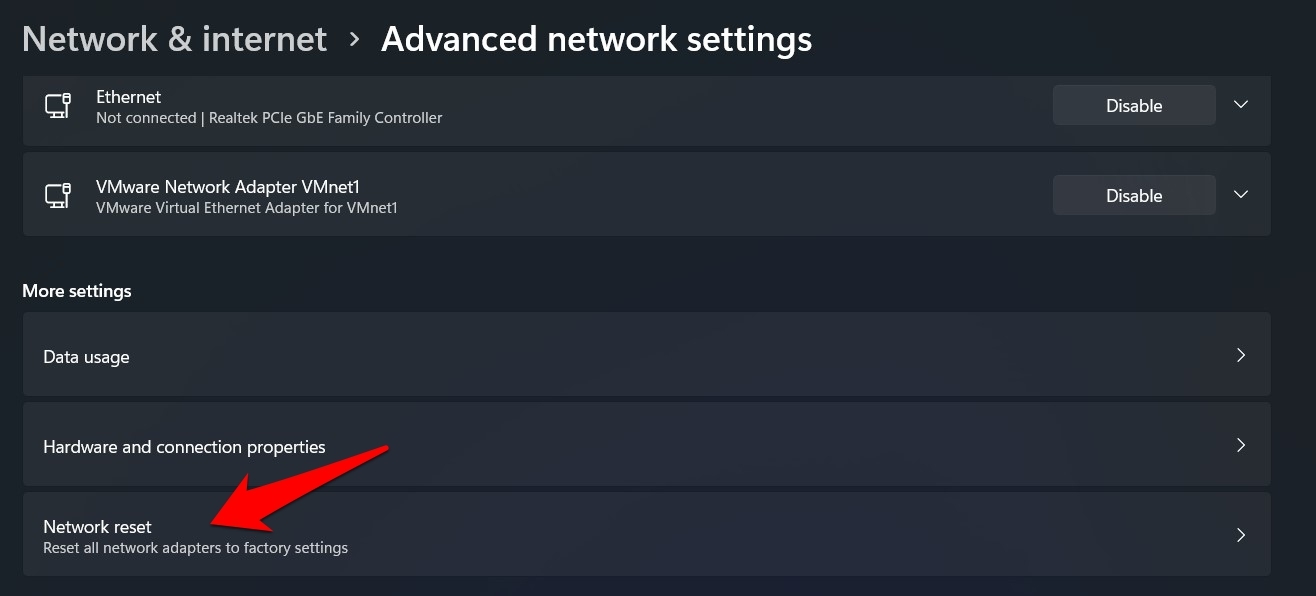
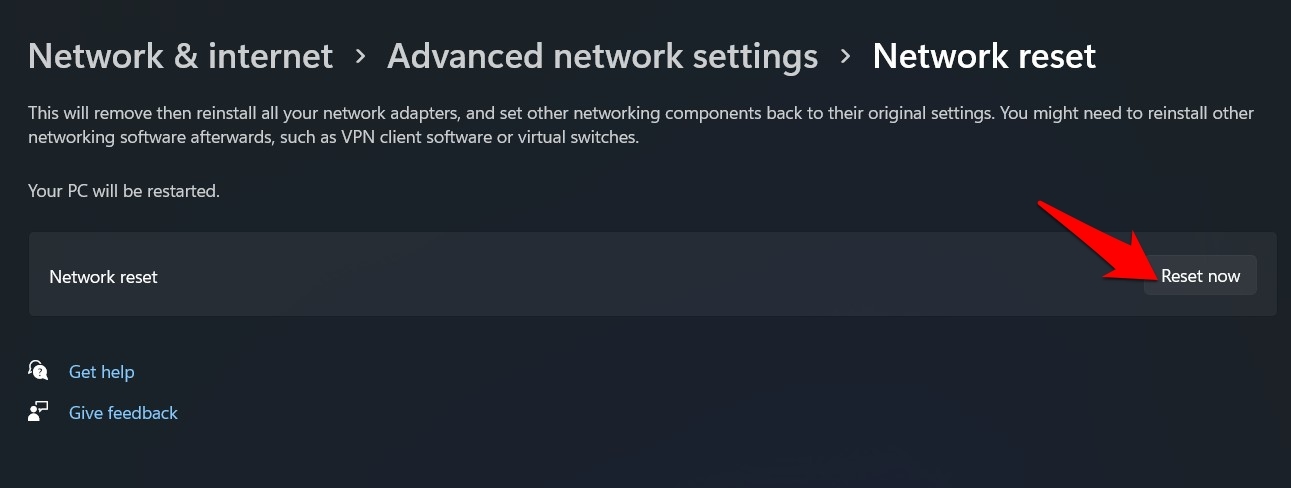
Fix 3. Reset Network
If none of the aforementioned methods spelled out success, then you should consider resetting your PC’s network settings back to its factory default, i.e., exactly how it came shipped out of the box. Here are the required instructions for the same:
Fix 4. Run Windows Troubleshoot
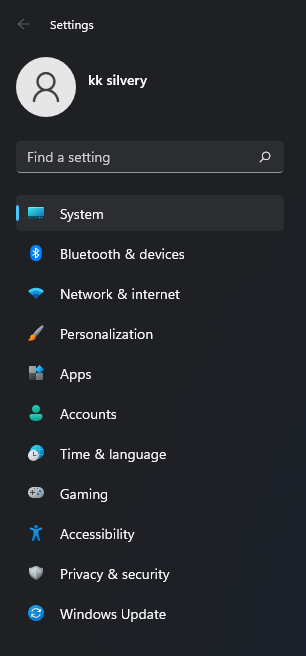
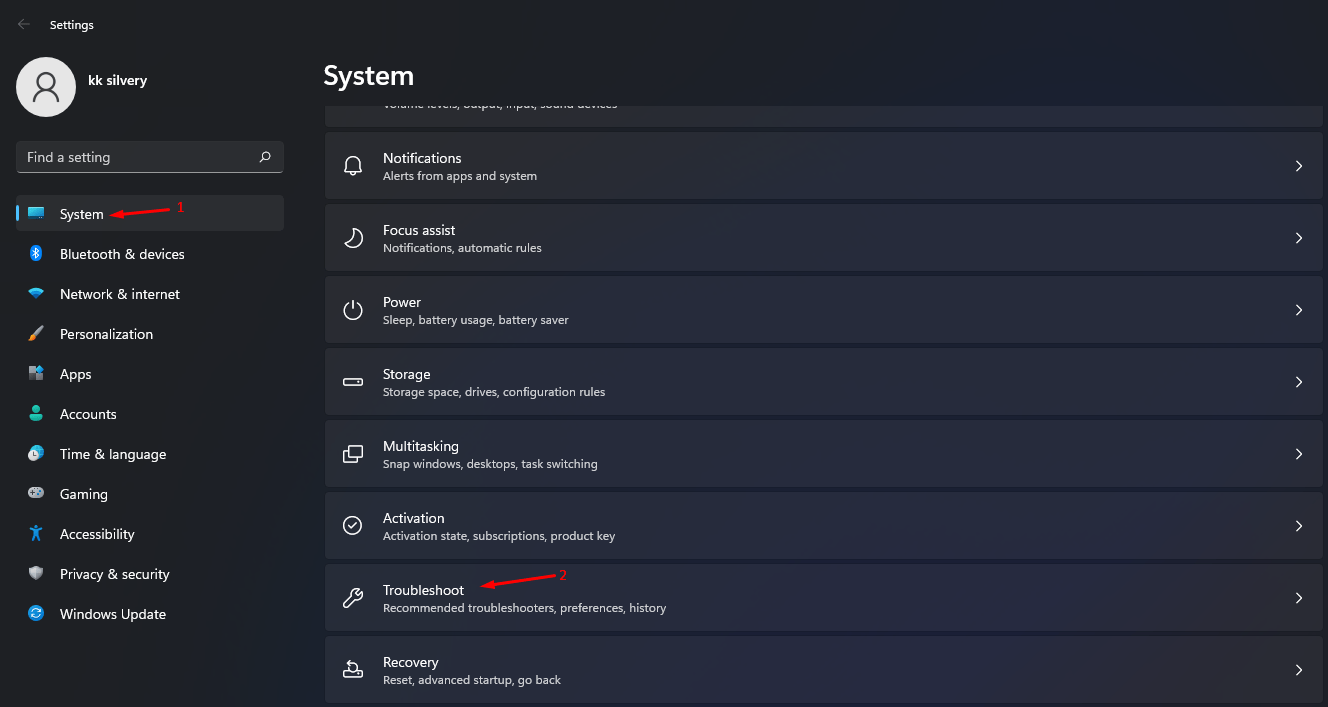
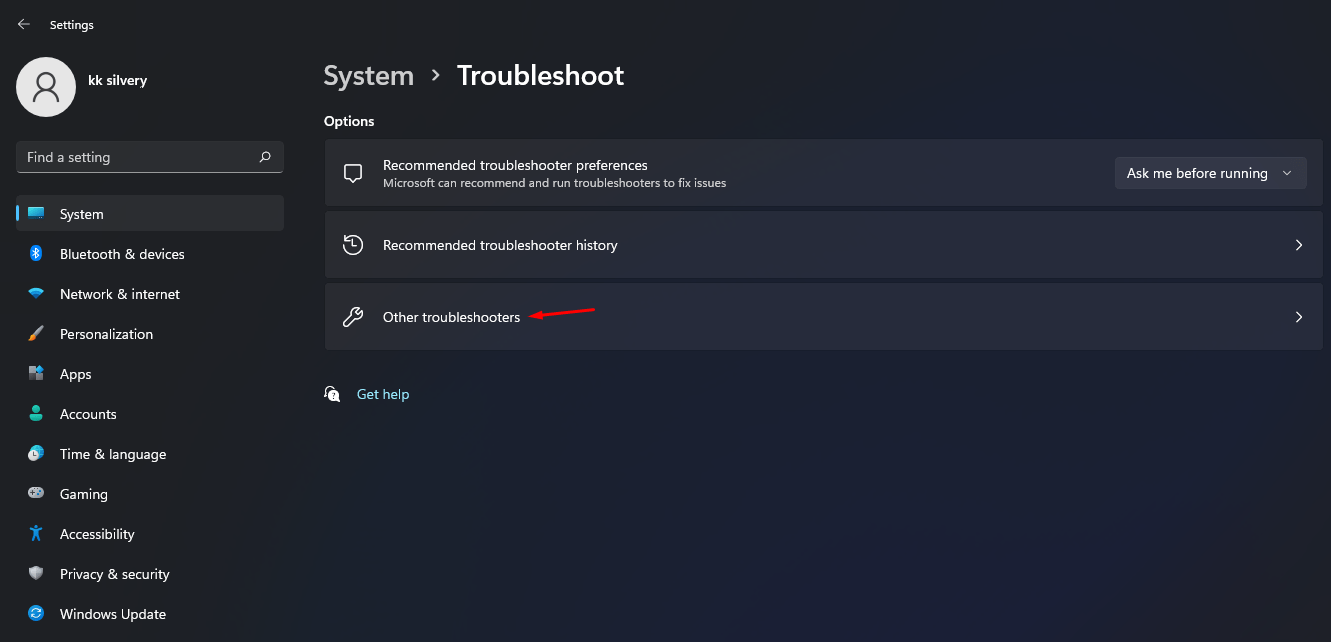
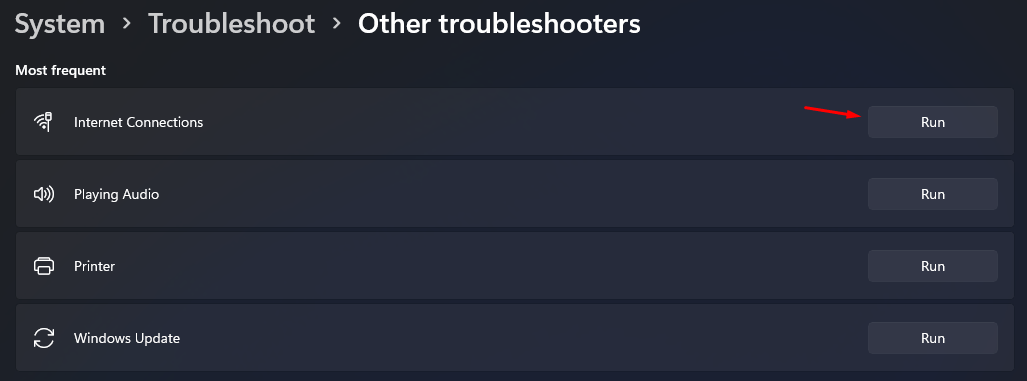
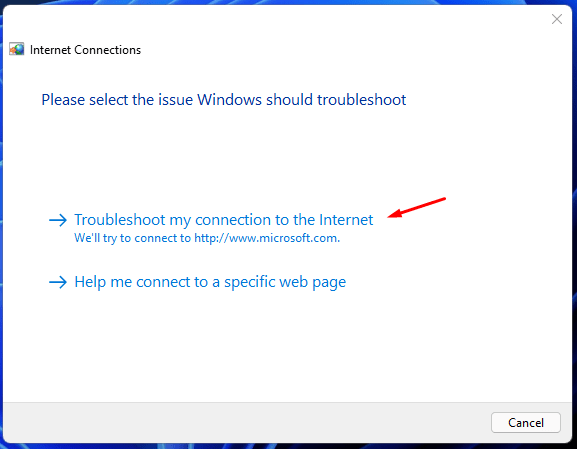
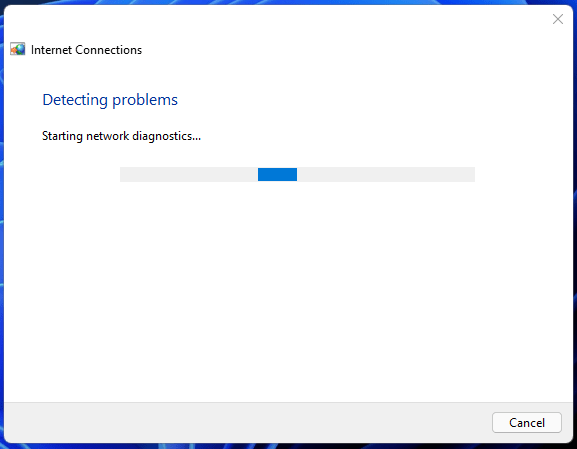
If the WiFi network software managing the connections has some faulty glitches or lacks some settings, then a simple troubleshoot can come in very handy. This will scan the WiFi drivers and settings to remove any network congestions.
Fix 5. Update Network Drivers
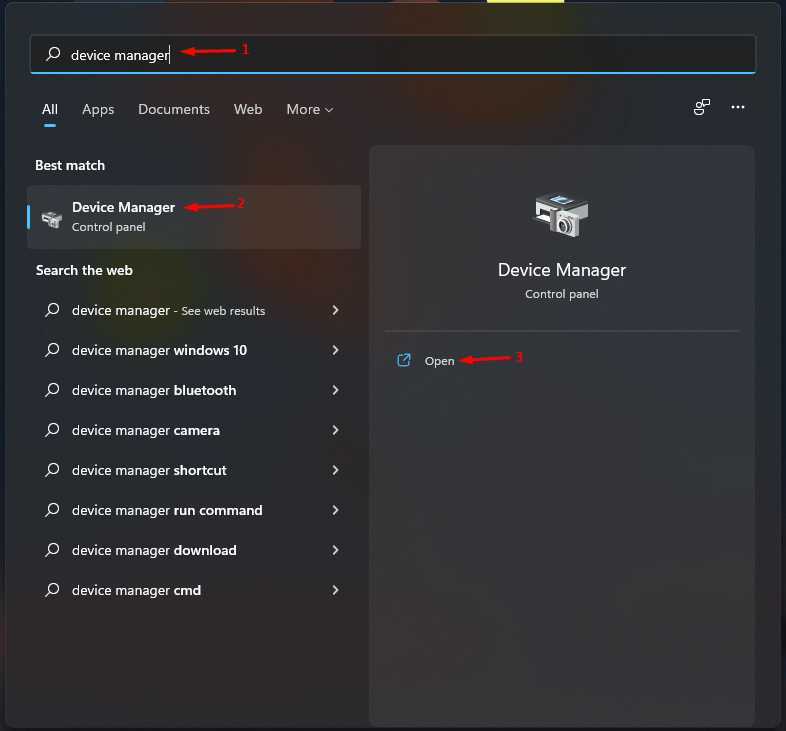
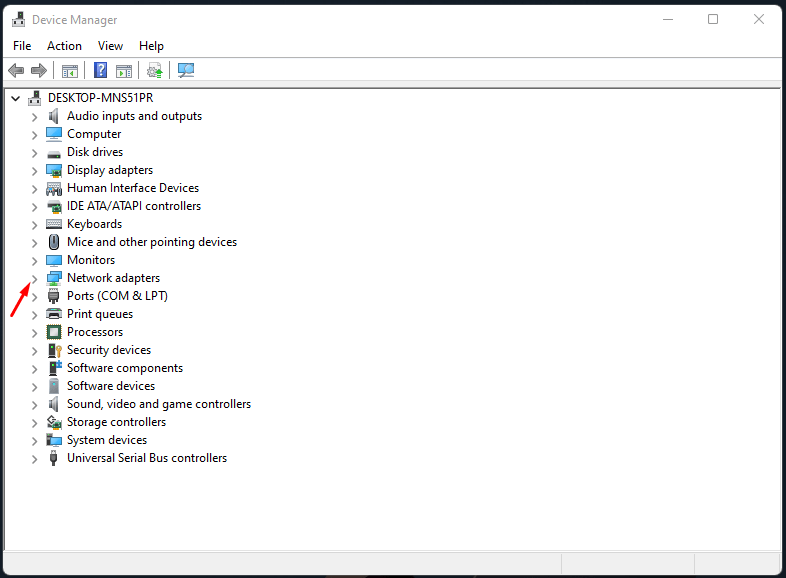
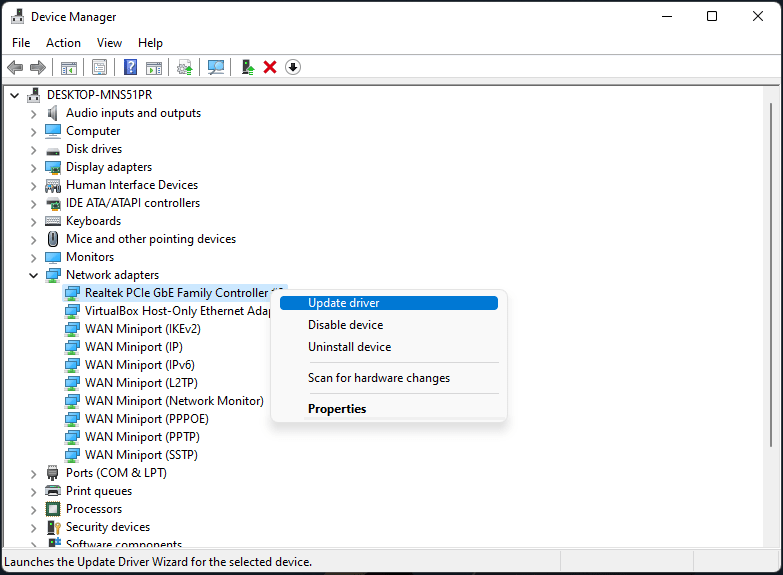
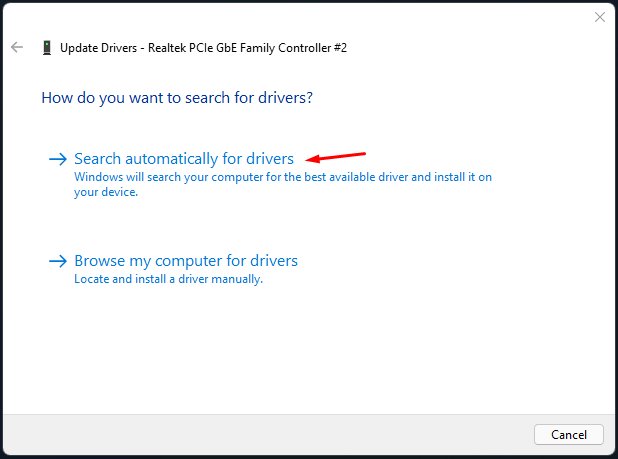
With an upgrade to Windows 11, the drivers are also updated, but this may not happen in some instances. If you are using old or outdated network drivers, then are bound to be some network-related issues. Therefore you should consider updating these drivers to their newest build right away. Once the installation is complete, restart your PC. When it boots up, check whether the WiFi connection error on your Windows 11 PC has been fixed or not.
Fix 6. Re-Enable Network Driver
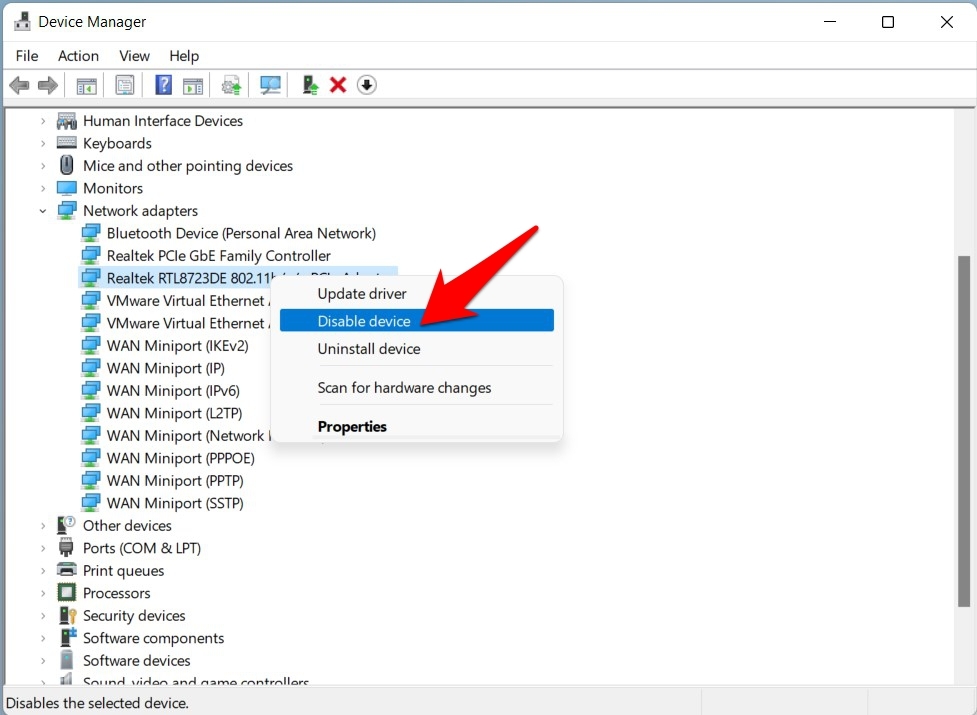
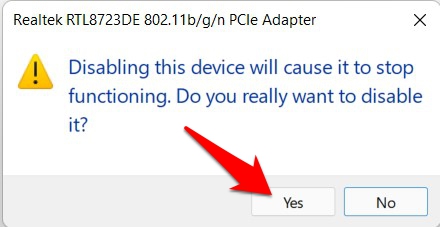
If installing the newer driver build didn’t do any good, then you should consider disabling and then re-enabling these drivers. This will give it a fresh instance to work upon, which in turn might fix the underlying issue. Once they are back up, verify if it fixes the WiFi Doesn’t Have a Valid IP Configuration error on Windows 11.
Fix 7. Re-Install Network Drivers
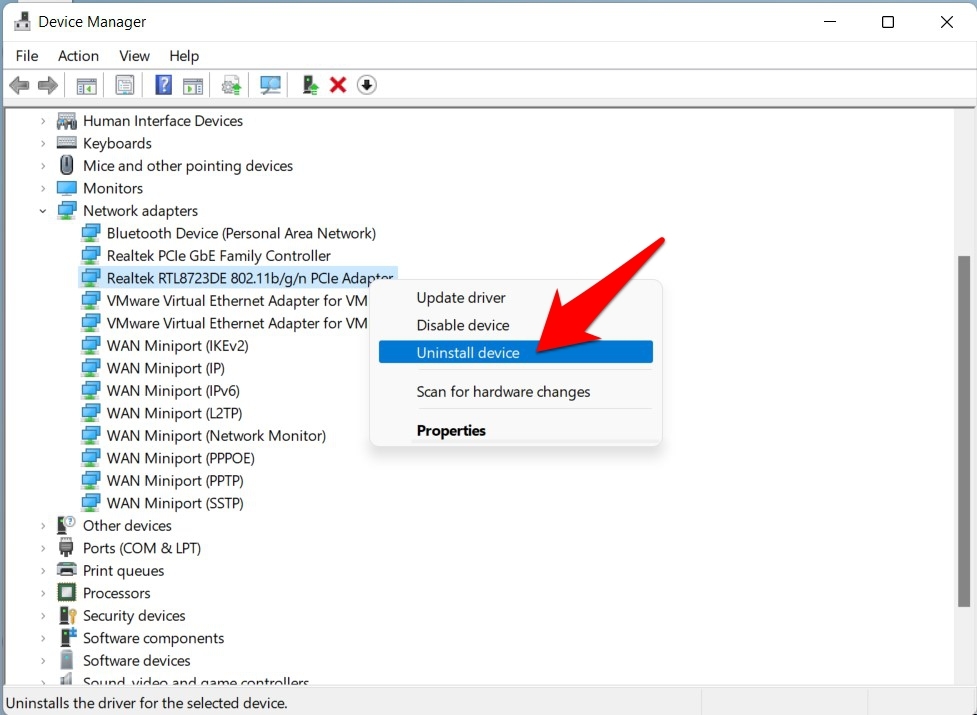
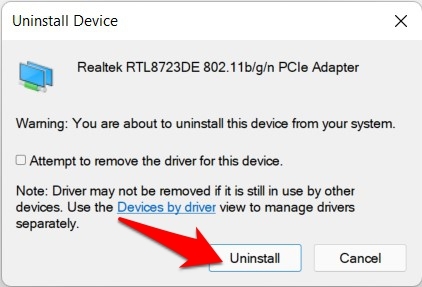
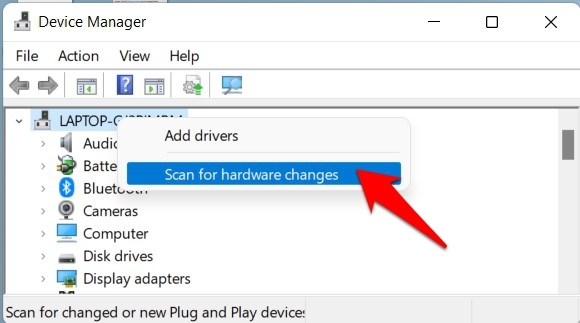
You can also consider uninstalling and then reinstalling the network drivers. Here’s how it could be done:
Fix 8. Release/Renew IP Address
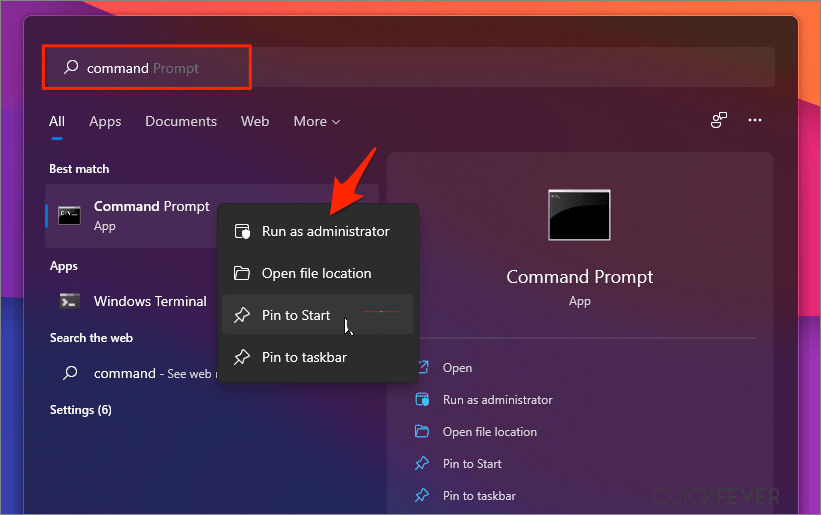
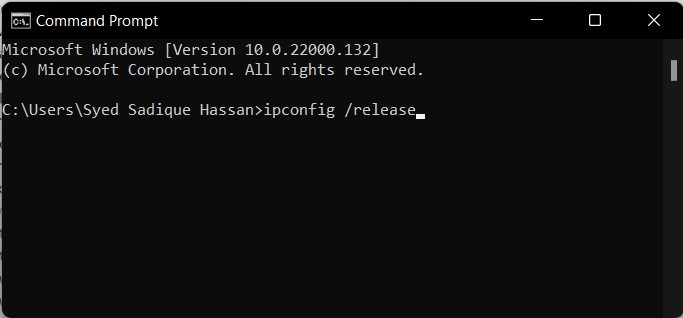
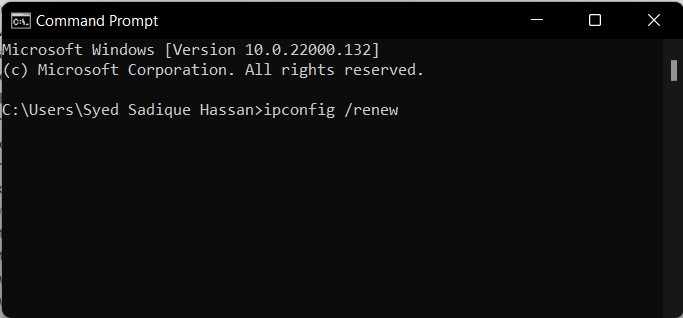
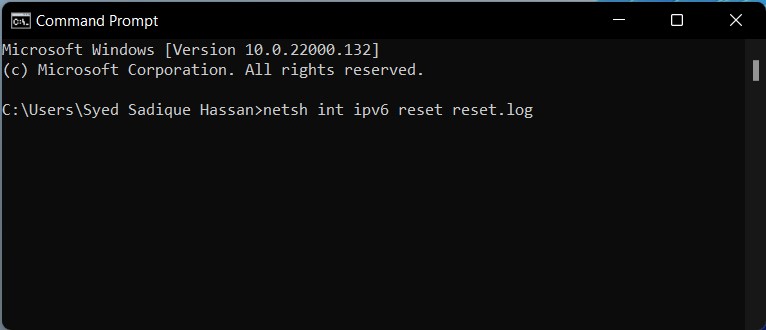
One of the most common reasons for this error is the incorrect Internet Protocol configuration. In this regard, your first course of action should be to let go of the current configuration and renew its new instance. All this could be carried suitable from the Command Window itself, here’s how: Now try accessing the web on your Windows 11 PC and check if the WiFi Doesn’t Have a Valid IP Configuration error has been fixed or not.
Reset TCP/IP
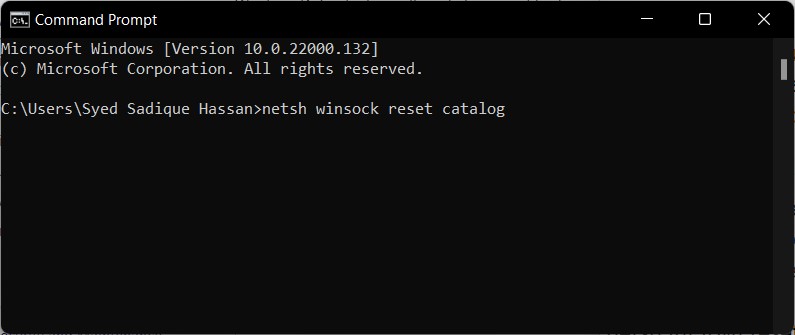
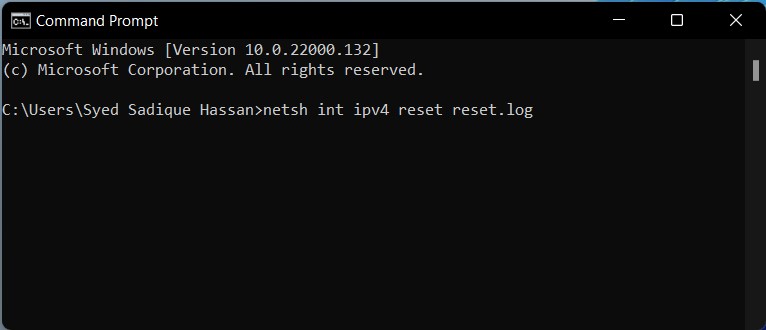
Any issues with this TCP (or any of its four layers) would fail in the data transfer process. The only way out in such cases is to reset it, as well as its Winsock catalog. Here’s how it could be done: That’s it; with this guide, you can fix WiFi connectivity or Limited internet access issues on your Windows 11 PC using this top solution listed above. If you’ve any thoughts on [Fixed] Windows 11 WiFi Not Working or Showing Limited Access, then feel free to drop in below comment box. Also, please subscribe to our DigitBin YouTube channel for videos tutorials. Cheers!
![]()
![]()
