Well, to minimize this confusion of yours, we tried out a handful of video editor apps and found out the Kinemaster managed to execute most of the basic functions with ease. Although some additional features might require you to shell off some bucks, the basic functionalities don’t require a penny. So without further ado, let’s check out what all the app has to offer, its interface, UI, and feature list.
What is KineMaster?
KineMaster is a fully-featured professional video editor for Android, supporting multi-layers of video, images, and text with state of the art cutting and trimming, you can have multi-track audio, volume envelope control, 3D transitions, Chroma key, animations, effects, VFX and more for free.
App Interface and Usability
Upon launching the app you are greeted with three options: to create a new video, accessing the app’s YouTube channel, or browse through their store for additional font styles, themes, animations, assets among others. If this is the first time you are using this app, you could give this asset section a miss, and tap on the central icon to start your project.
Basics
To begin with, you will have to select the video’s aspect ratio- 16:9 offers the landscape mode, 9:16 the portrait mode, or the custom 1:1. The next menu divides your screen into two halves: it is the upper one that you should be your focus as of now. Select the desired video (or videos) on which you need to act upon. All your selection will then be placed in the bottom half. You could select any of your videos to further act upon it.
Operations
For example, you could trim or strip it, pan or zoom or adjust its audio. Apart from that, there are three other options: Clip Graphics, Speed, and Reverse. The first option gives you the ability to add effects to the selected portion of the video. The stock effects are quite impressive as well, but if you wish to up the game, there’s plenty more waiting for you in their Store (both free and Paid). The next feature (speed) lets you fast forward or slow down the video as per your requirement. Once that is done, you will see a circular wheel with some more options. These are the Media, Audio, Voice, and Layer. Download KineMaster APK
Video Layer Support
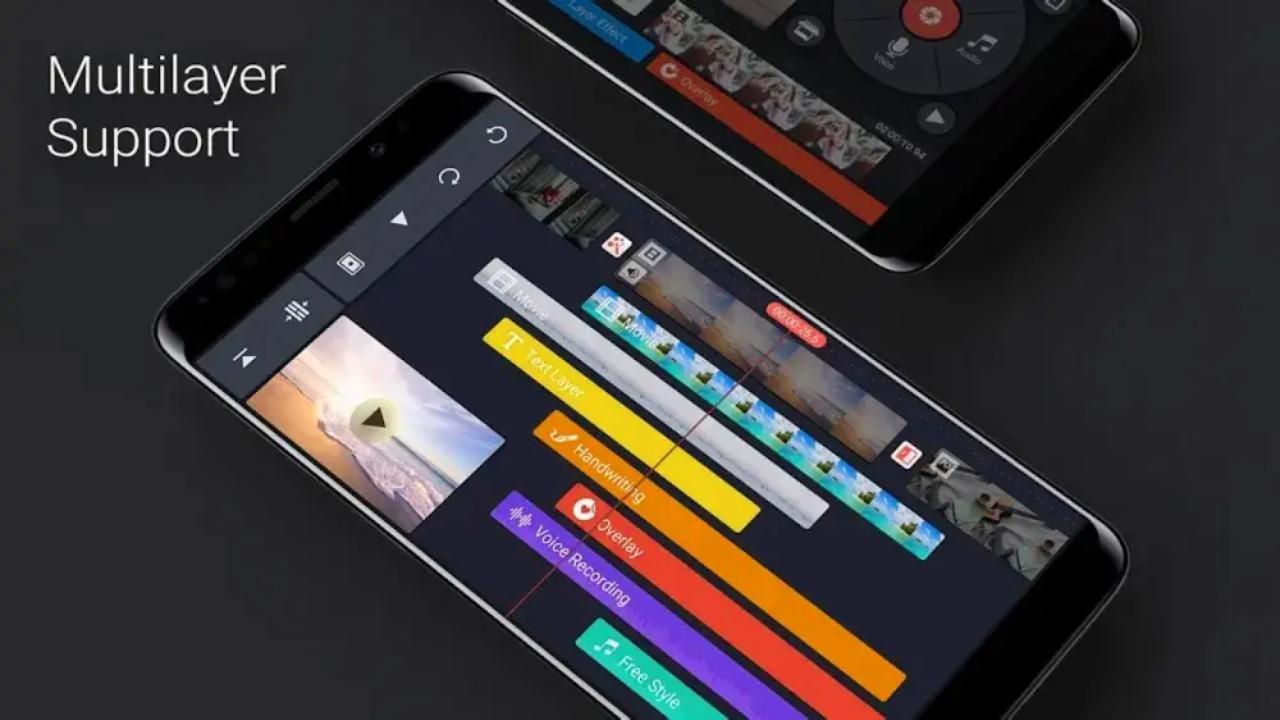
The Media option lets you add more videos to the existing batch. The Audio feature allows you to add custom sounds whereas the Voice functionality lets you record and add your voice. Then there is the Layer feature, and it holds some pretty interesting options. As the name suggests, any feature you choose from this section will be applied as a layer on top of your video.
Miscellaneous Features
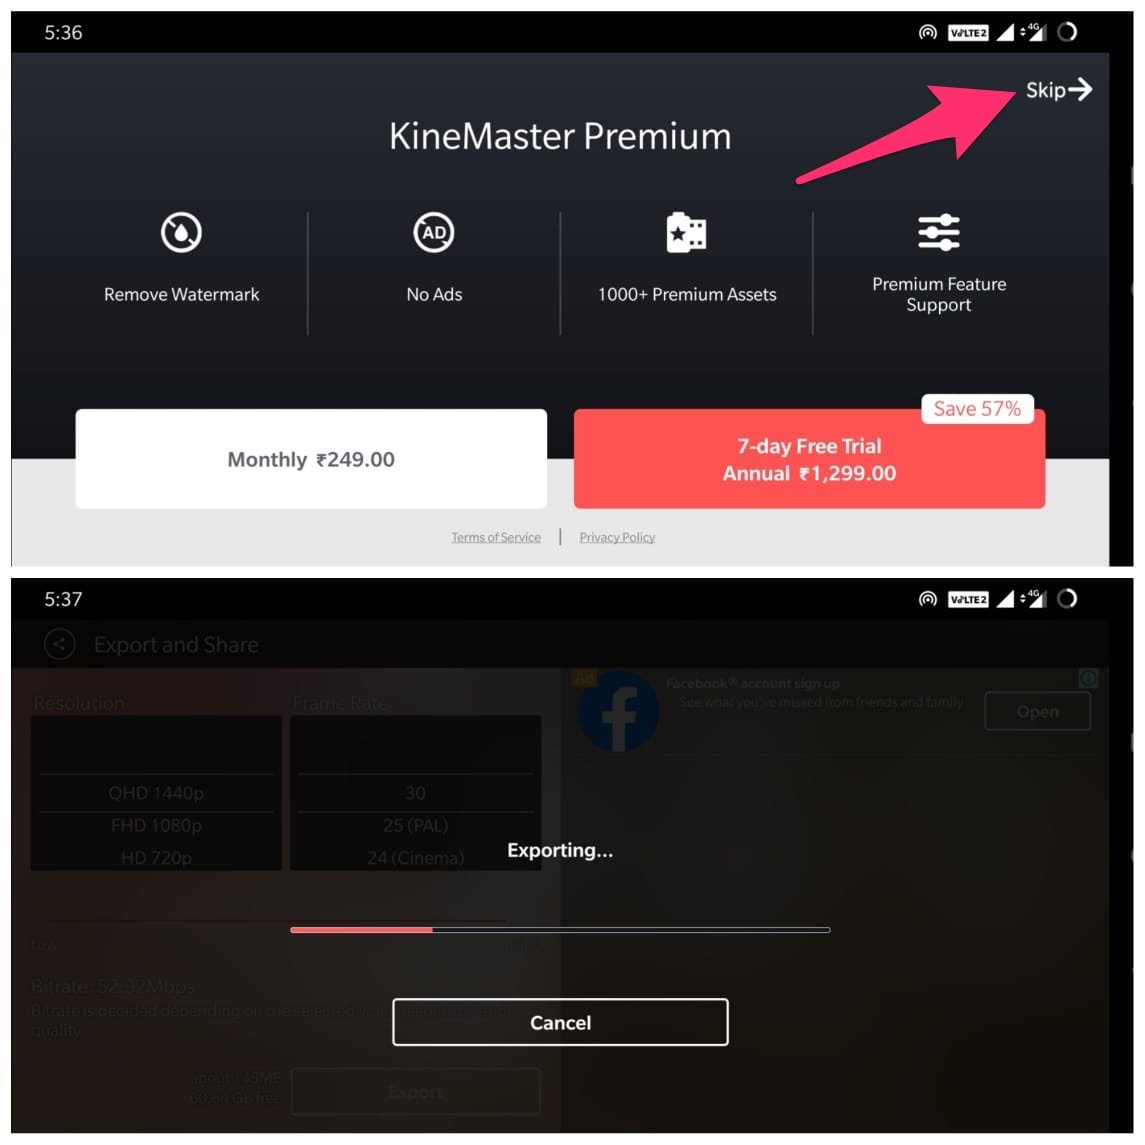
You could further customize this added video using a plentitude of other features that the app offers, namely: Out and In Animations, Chroma Key, Cropping Reverse, Opacity, Color Filter, Reverb, Voice Changer, Mirroring, etc. Do keep in mind that you could get many other such assets for each of these types from the Store section as well. When you have done all the customizations, hit the Play icon to preview your created video, and then tap the Share icon to bring the Export and Share window. Just select the Resolution (from SD 540P up to 4K 2160p quality), the Frame Rate (from 12 to 30), and the Bitrate and hit the Export button to save this clip.
Chroma Key
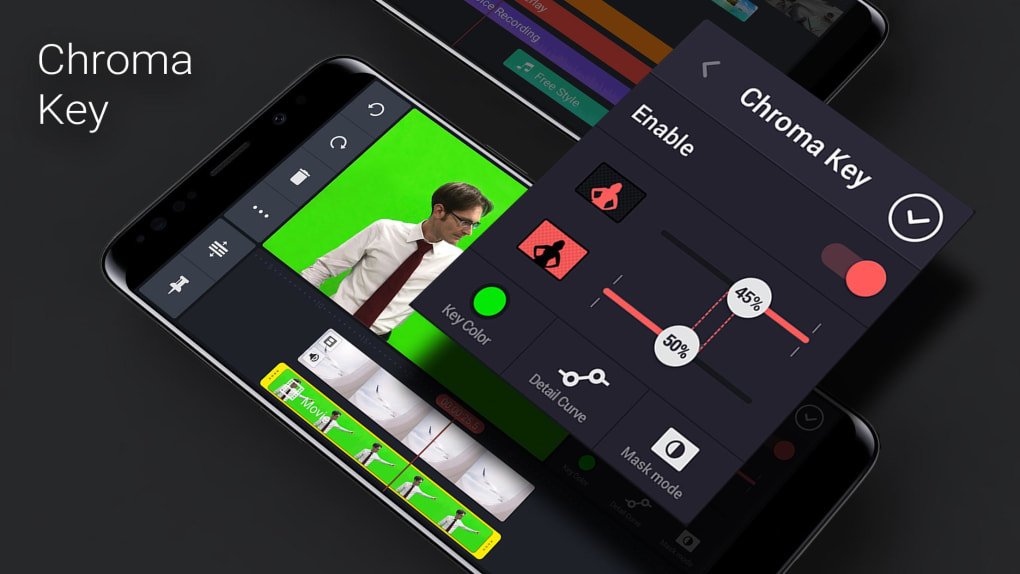
Chroma Key is a visual effects technique for compositing (layering) two images or video streams together. The technique has been used in many fields to remove a background from the subject of a photo or video. It helps to superimpose a video or image layer on any existing media file. You can create high-quality VFX effects with Chroma key Option on your mobile.
Audio Balance
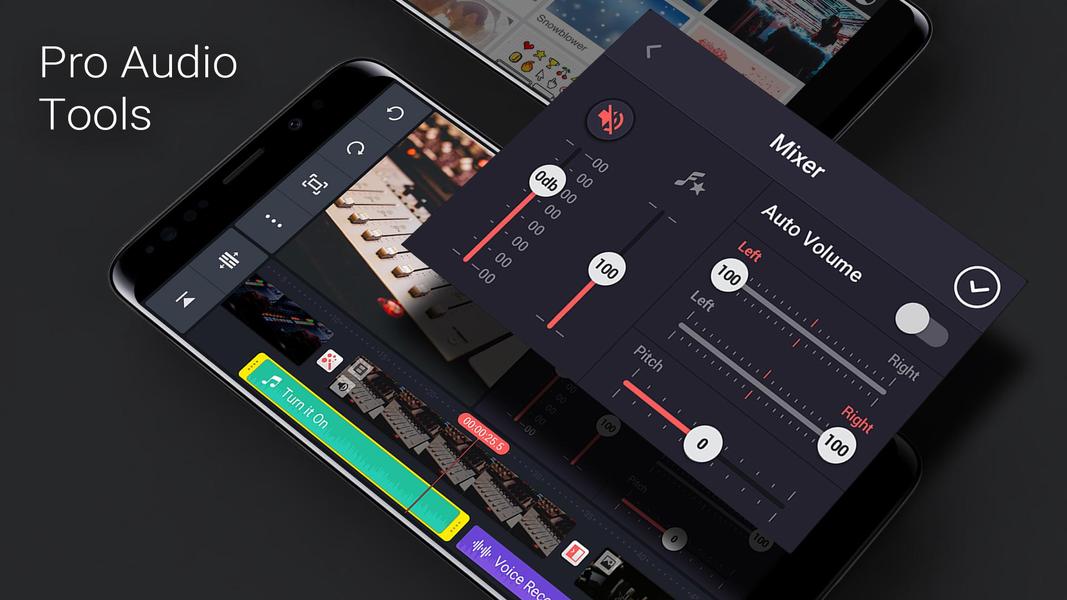
The App comes with Audio Enhancers, Voice Over, Audio Envelope, Pitch Settings, Audio Mixer, Template Mixer, Bass Settings, equalizer, and more intricate sound settings for better audio output.
Pricing Strategy
All your videos will have the KineMaster watermark by default. To remove them you will have to spend around 249/month or there’s a 7-days free trial after which you will be charged around Rs 1299/year. Apart from that, the premium version also removes ads, gives you over 1000+ Premium Assets, and gives you a Premium Features Support window as well. If you don’t wish to try out the Premium version, just hit the Skip button situated at the top right and the export process will then begin. This might take some time, depending on the size of the video and its bitrate, quality, and resolution. You will be able to access all your created video from the right-hand screen, with the option to view it, delete it, or share it using the preferred social media apps.
Other Useful Features
Let’s now have a look at some of the other noteworthy features of KineMaster.
Elegant User Interface
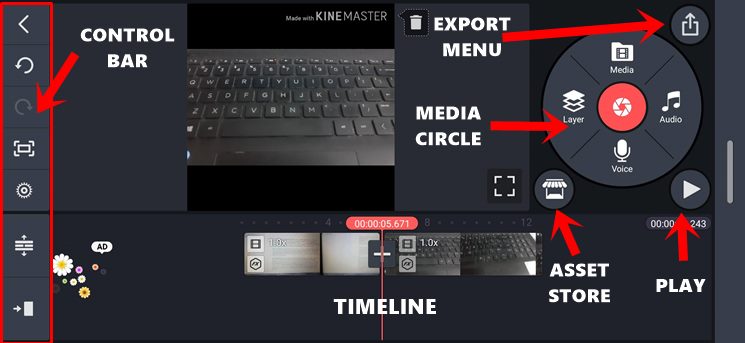
Maintaining a balance between the plenitude of features at stake and a clean UI was always going to be a tough task. However, the app seems to have done a pretty decent job in this regard. At the center of your screen is the video you are currently editing. On its left, you get a Control Bar which holds options like Redo, Undo, Share, and Project Settings with some advanced functionality. Then there is a Media Circle at the top right giving out the options to add Video, Audio, another media from your Gallery, or add a Layered video on top of the current one. On the bottom left of this Media Circle is the Asset Store while the right side holds the Play button. While to its top-right side, you get the option to export your creations. The bottom bar has the timeline which shows all the videos that you are currently dealing with, their durations, and the edits and layers that have been added. You could also tap on any video from the Timeline to bring about the editing toolbox for the selected video.
Real-Time Editing Capabilities
This is perhaps among the most useful functionality of the app, giving you the ability to edit audio and videos on the go. You could keep recording the video and at the same time, try out the app’s editing capabilities. Apart from that, you could even add a second layer of audio/clip. All this is done in real-time, without the need to even finish your recording.
Video Adjustment Tools
There are a plethora of video adjustment tools available for users. The brightness, saturation, warmth, and color correction all could be carried out pretty easily, giving your videos a rich and consistent look.
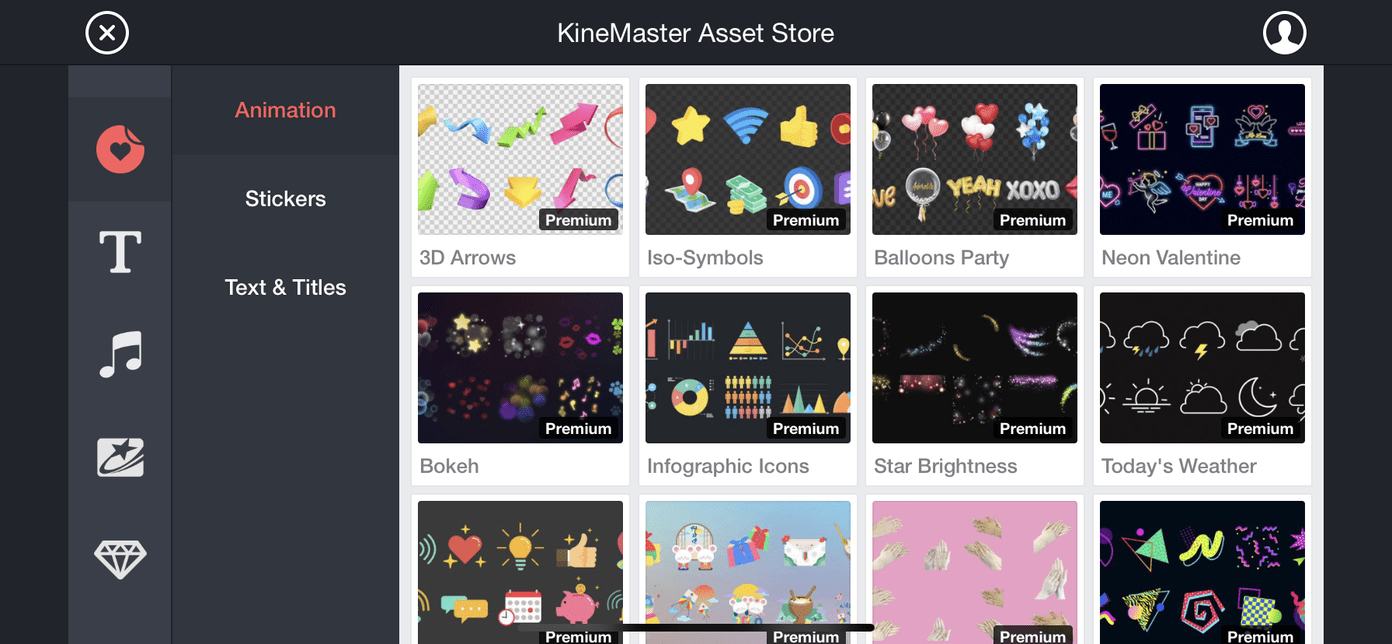
Asset Store
While the app itself has plenty of customization options, you could further expand them by visiting the Store. Furthermore, not all the items available in the store are paid, you could still get your hands on decent assets that don’t cost any penny.
Layered Editing Capabilities
The app has some nifty tricks up its sleeves when it comes to adding a secondary layer of video or audio clip on top of the primary one. Right from adjusting the size and position of the layered video, you could even have separate animations, sounds, visual adjustments, and transition effects just for the second layer, keeping your primary layer intact. This gives separate identities to both your videos. You could even use the Handwriting tool to doodle over your video or use the text feature to add stylised texts. But remember not to add too many transitions to the secondary video, if your primary clip already has one. It might end up on the wrong side, making it more animated than what was required. Furthermore, the app also blends both these layers in such a manner that it is hard to distinguish and separate one layer from another. It has definitely managed to earn a few brownie points in this segment.
Social Media Integrations
When you are already with your creations, it is anything but obvious that you would like to share it across various social media platforms. The app seems to have taken a note of that as well. In the Export Video screen, you get the option to share your work on YouTube, Instagram Story, Feed, WhatsApp, Telegram, and countless other apps. This direct way of sharing your creations is a real timer saver, given that the switching of apps isn’t required. Android (Play Store) | iOS (App Store)
Concluding Remarks
Rounding off, this was all from this guide on the KineMaster Video Editor app. Although there are indeed tons of useful features to deal with, the app has made sure that it doesn’t give out a cluttered UI experience. Furthermore, as mentioned before, there exist plenty more apps belonging to this domain, but the sheer number of features, the hassle-free editing capabilities, and the ease of app usability make this one the video editor app for the masses. On that note, we would love to hear your views about this app. Is this your preferred application, or have you settled for anyone else? Share your opinions in the comments section below. If you’ve any thoughts on KineMaster Review | The Video Editor you Can’t Ignore, then feel free to drop in below comment box. Also, please subscribe to our DigitBin YouTube channel for videos tutorials. Cheers!
