Well, it’s because there are quite a lot of distinguishing features between two different displays even if they both read out the same “1920 x 1080” resolution. So what are these distinguishing features and more importantly, how to optimize these settings to get the most out of the video being played? This guide shall address all these queries by listing out the steps to improve and enhance the overall video quality on your Windows PC. Without further ado, let’s get started.
Windows HD Color Settings
The options present in this section focuses on two important aspects: High Dynamic Range and Wide Color Gamut. The HDR feature adds more contrast to the bright and dark scenes to make them stand out from the rest of the crowds. This then coupled with WCG gives it an upper hand over the traditional SDR, as you would now be getting more colors, saturations, and hues to choose from.
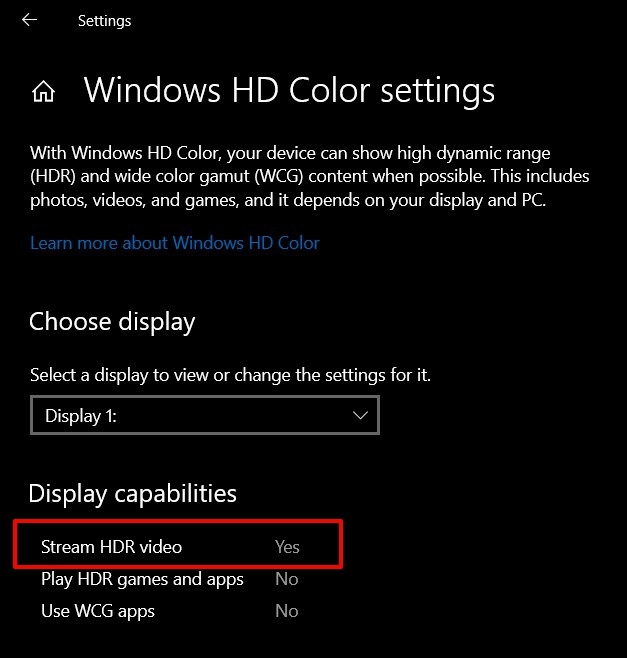
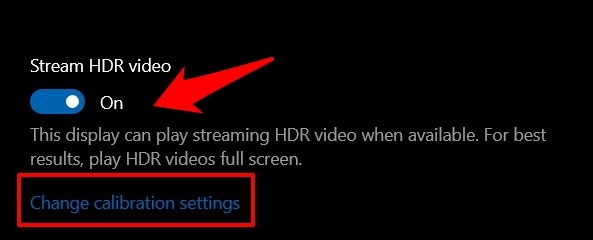
With that said, start by searching for the Windows HD Color Settings from the Start menu. Then select the active display from the list and then refer to the Display capabilities section. Now verify if your monitor could handle HDR videos, games, and apps. However, even if your display is capable of playing HDR videos, it wouldn’t be enabled by default. To turn it on, you will have to enable the Stream HDR Video toggle and after that, you will have to calibrate the display settings accordingly.
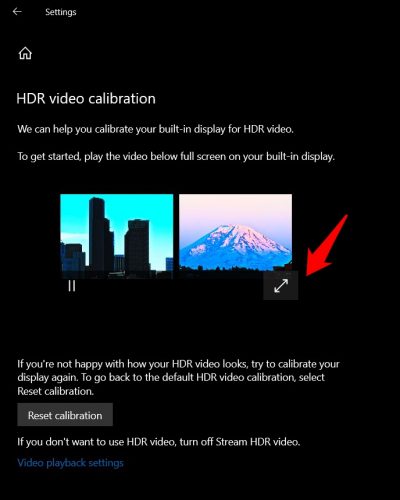
So click on Change Calibration Settings. Now hover the mouse over to the video thumbnail and click on the Full-Screen option. Then drag the slider and place it at the point where you find the optimal balanced display settings for the HDR content. However, if at any point in time, you wish to revert to the original settings, then just click on the Reset Calibration button.
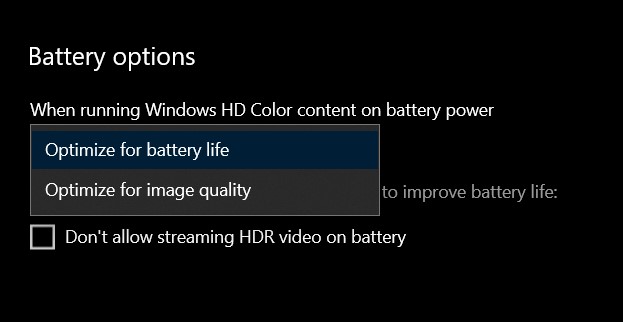
The last option in this list is how you would like to treat these HDR contents, whether they should respect the device’s battery capacity or give greater attention to the performance. To opt for a more aggressive approach, then you may enable the “Don’t allow streaming HDR video on battery” option as well.
UWP Apps Display Settings
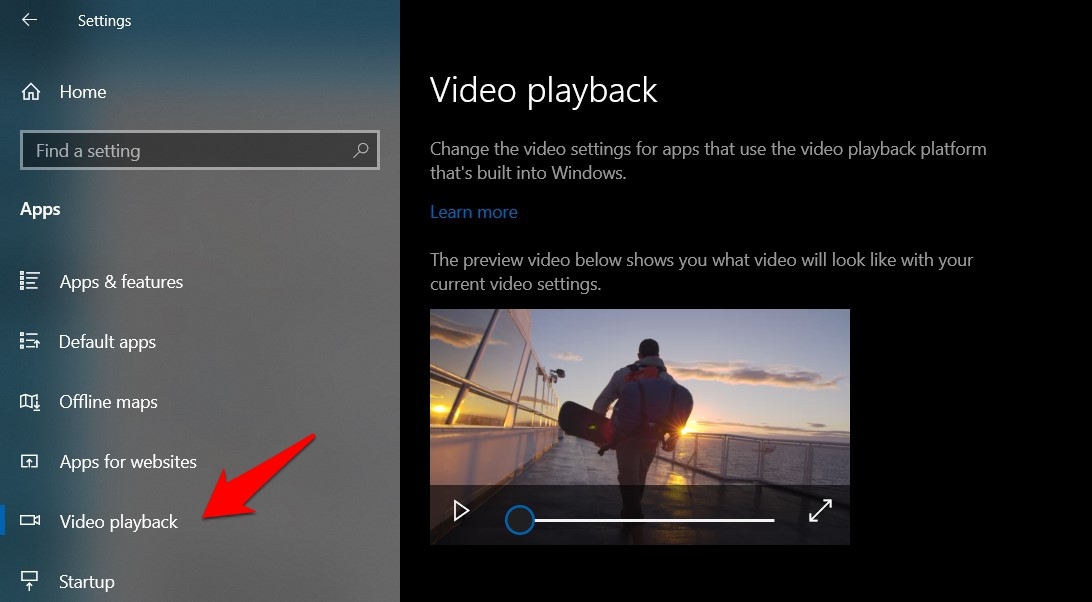
Built-in Windows 10 apps that are part of the Universal Windows Platform (or UWP) such as the Microsoft Edge browser, and Movies & TV apps respect your PC’s video playback settings. Likewise, third-party video streaming apps that you have downloaded from the Microsoft Store (such as Netflix and Hulu) also follow the same rule. To optimize these UWP apps’ video playback settings, follow the below steps:
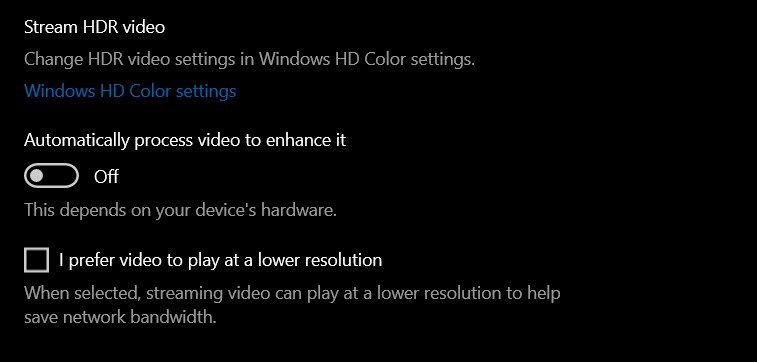
The first option allows you to tweak the settings of the High Dynamic Range videos. Click on Windows HD Color Settings and you should be taken to that page. We have already discussed all the features that it beholds in a comprehensive section above. Just to recall, you could change the Stream HDR video option, Calibrate the display, or make Windows aware of how it should treat HD color content when your laptop is charging.
The next option is to Automatically process video to enhance it. The name of the feature is quite vaguely defined and doesn’t spell out much clue. To help you out, you may consider it as a hardware acceleration feature. Upon enabling this feature, supported UWP apps will use your PC’s GPU power to process the streaming videos. Next up, comes the option titled “I prefer video to play at a lower resolution” and is pretty self-explanatory in itself. So if you are having limited internet or are using a metered WiFi, then it’s better to turn on this feature.
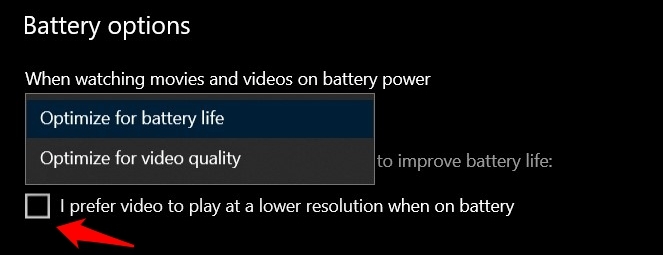
Rounding off this list is the Battery options, which are again the same as the Windows HD Color Settings i.e whether you prioritize battery-saving over video quality and vice versa. Likewise, you could also enable the option to lower the video resolution when your laptop is on battery.
Tweaking the Display Resolution
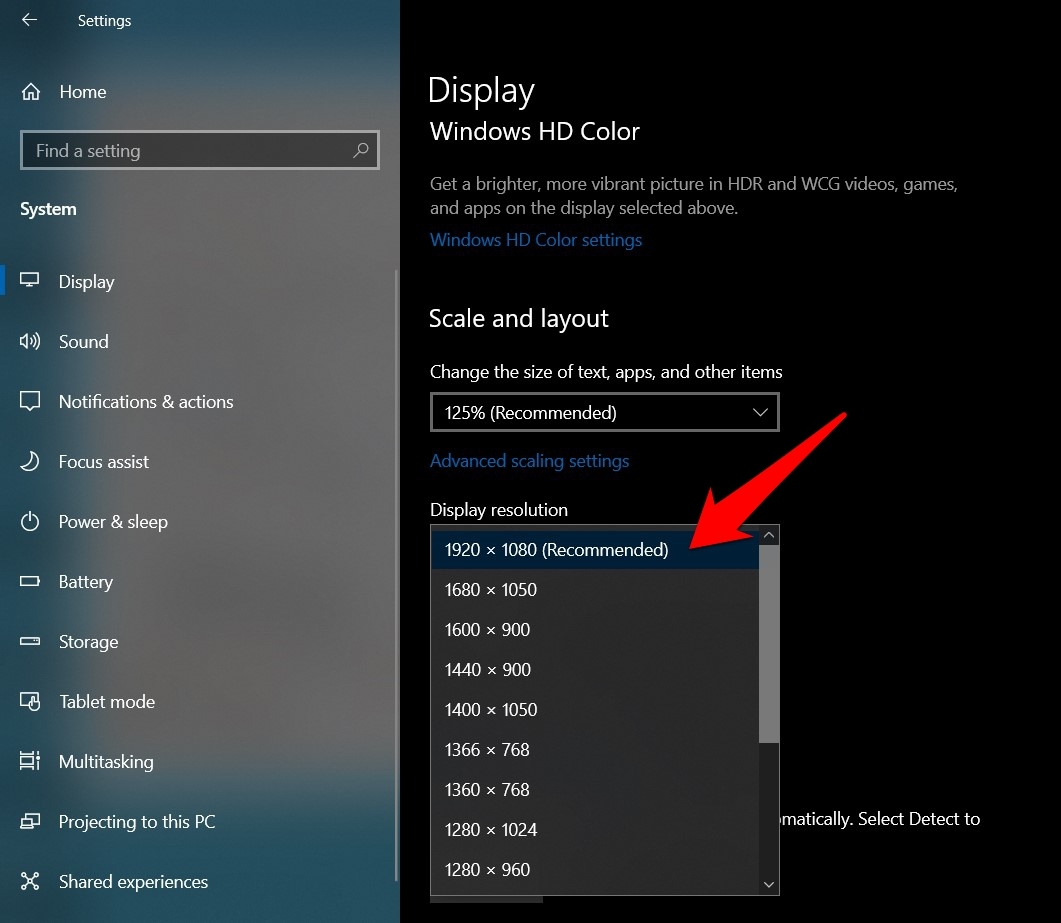
You also have the option of changing the resolution of your screen display. By default, the system automatically sets the highest available resolution. But in some limiting conditions such as when your laptop is low on power or when the GPU is unable to render the required number of pixels, then it might scale down the overall resolution.
But you still have the option to tweak this resolution and set it at the desired limit. To try it out, use the Windows+I shortcut to bring up the Settings page and go to the System section. Then scroll to Display resolution and select the desired one from the list. It is generally advised that you stick with the recommended level (if it is less than the maximum available one) as Windows keeps various factors into consideration before tagging the recommended keyword next to it.
Calibrating the Display
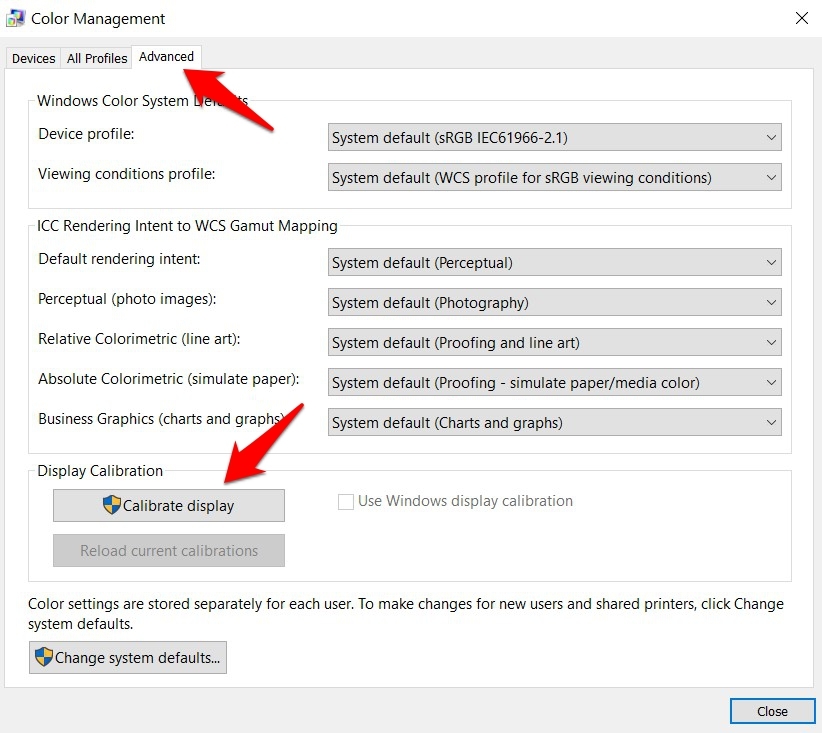
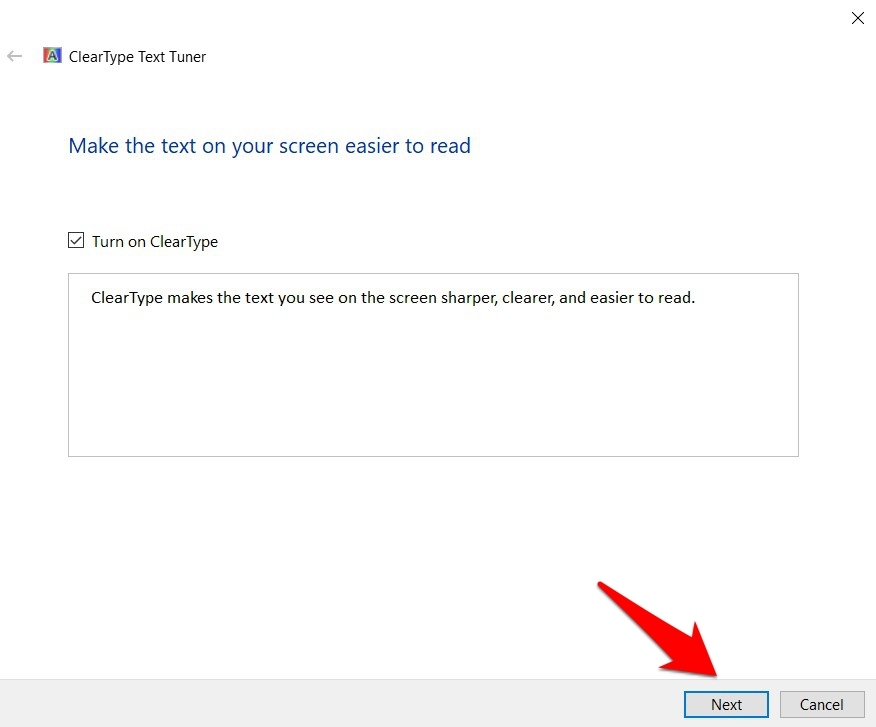
If you feel that the color is slightly distorted, or the contrast is not as per the required limit, then you could re-calibrate the display. It will also take care of the game and the brightness level. Along the same lines is the ClearType settings. This option allows you to make the contents appearing on your screen to be sharper and clearer. On that note, here are the instructions to fine-tune your display as per your preferences using both these settings:
Changing Desktop Settings via Graphics Card
In most instances, the default color correction and screen resolution on your PC should be sufficient. But if that isn’t the case, then you should first prefer calibrating the display, as mentioned above. However, if that doesn’t lead to any fruitful conclusion, then you could take this a step further and change the settings via your dedicated graphics cards such as Nvidia and AMD.
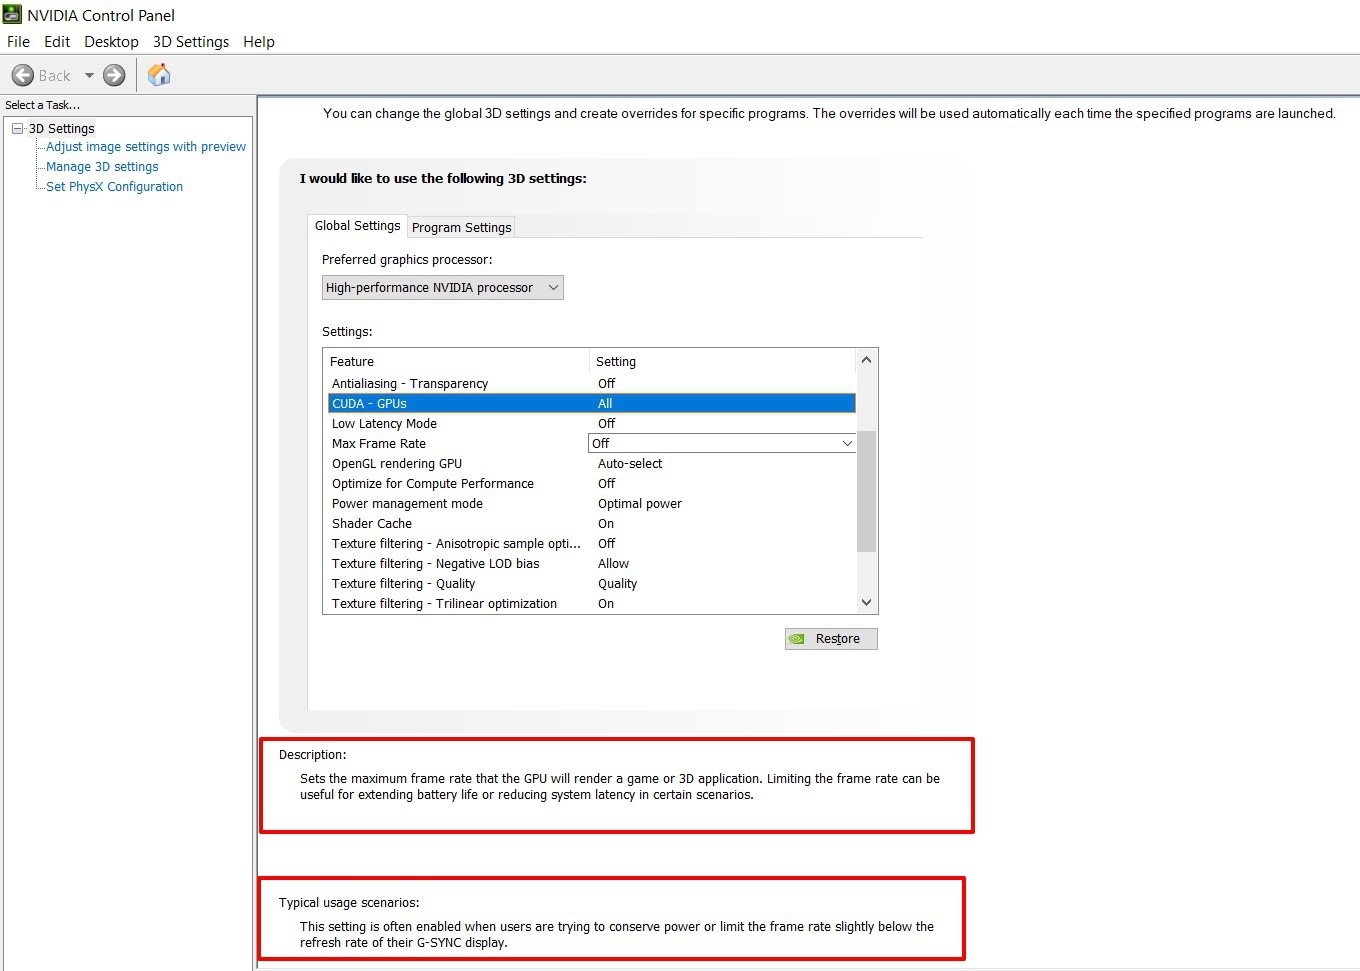
As an example, let’s check out the 3D settings page of the Nvidia graphics card. So right-click on your desktop on an empty location and select Nvidia Control Panel. Now under the 3D Settings page, you will have a lot of options related to the FPS, GPUs, and VSync. Make sure to read their description and typical usage scenarios before proceeding ahead with changing their settings.
Conclusion
So with this, we round off this guide on the steps to improve and enhance the overall video quality on your Windows PC. Do keep in mind that there are no universal settings as such that would work out wonders. It ultimately boils down to your laptop’s screen, its support for HDR, the inbuilt GPU, and graphics card, among others. With that said, do let us know in the comments section which of the aforementioned tweaks gave out the best results in your case. If you’ve any thoughts on How to Improve Video Quality Windows?, then feel free to drop in below comment box. Also, please subscribe to our DigitBin YouTube channel for videos tutorials. Cheers!
